The Raspberry Pi is already versatile out of the box. But with hardware extensions that are plugged directly onto the board, you can significantly increase the possibilities. We introduce you to some remarkable components.
With the “Hardware Attached on Top” (HAT) concept, the Raspberry has an easy way to expand its capabilities. The add-ons are simply plugged onto the GPIO pins on the board. The expansion kits usually also include plastic spacers to protect against short circuits if the main board and expansion board come too close together. The range of such extensions has grown considerably in recent years. In addition to the official HATs, the manufacturer Pimoroni stands out in particular.
In this article, we present a series of particularly interesting HAT boards. The focus is on model 4, but the boards presented here can also fit older models or the brand new Pi 5, although they do not have to. You should therefore find out about compatibility before you buy (see last point “Check before you buy!”).
Rich sound with DAC
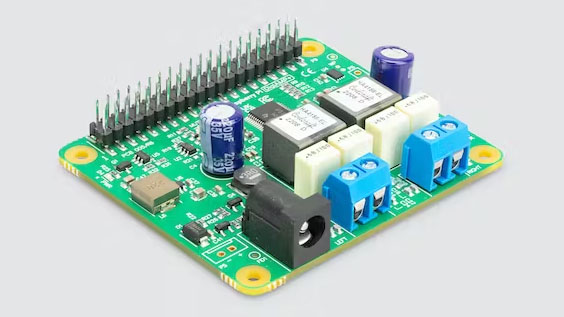
With a DAC, you can connect the board to passive or active speakers or to the stereo system. This turns the Raspberry into a streaming box.
Raspberry Pi Foundation
An extension that works immediately, i.e. “out of the box,” improves the sound characteristics of the board. The Raspberry Foundation has various models of such “Digital Audio Controllers” (DAC) on offer.
Which board is right for you depends on your environment. The Digi AMP+ is the right choice if you want to connect passive speakers to the computer. The board offers the usual clamp connections for the cables and delivers an output of up to 35 watts per channel. That’s definitely enough for the living room at home.
The Raspberry Pi DAC or its Plus version, on the other hand, are intended for active speakers. They offer the classic connection via banana plugs. In such a system, the speaker with the integrated amplifier is connected to the signal source. The HATs convert digital signals into analog signals so that you can connect the Raspberry either directly to loudspeakers or the stereo system (AUX input). In combination with the right software, you can turn the Raspberry Pi into a streaming box for the WLAN or use it to play music stored on data storage media.
For all Lego fans
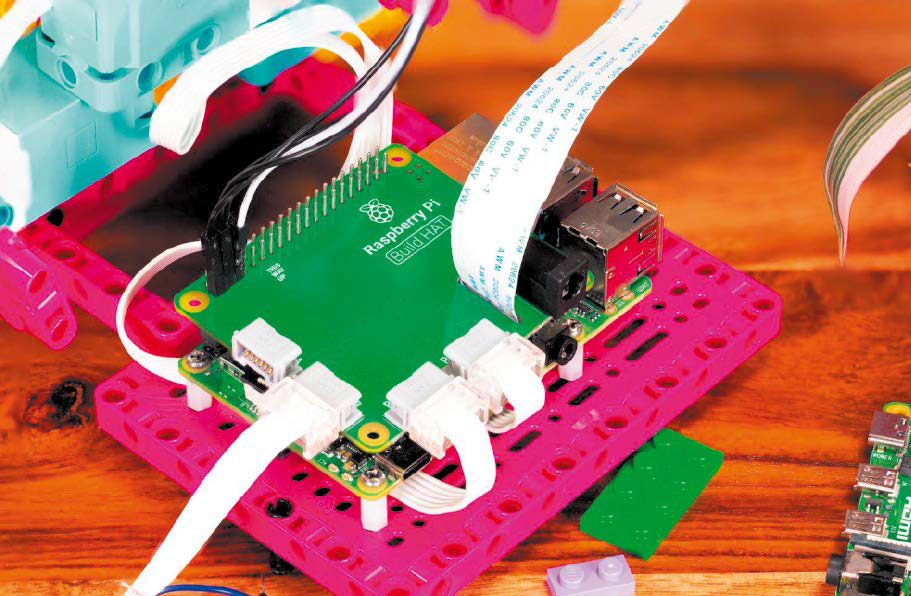
The HAT for Lego hobbyists opens up new possibilities for controlling sensors and motors from the Lego cosmos via Raspberry.
IDG
The Raspberry Pi Build HAT expansion board, which can control up to four motors and sensors — including components from the Mindstorm cosmos — is available for all ambitious Lego hobbyists who are intensively involved with Lego Technics. You can even find a Lego board in specialized shops, which you can use to integrate the board directly into your Lego creations. You can connect most components that use an LPF2 connection. Details on compatibility can be found on the board’s official product page.
But beware: The integrated power supply is not sufficient to operate a motor on the board.
An external power supply unit is offered as a supplement to the HAT board, which is only suitable for this component. You cannot use this power supply unit to operate the Pi 400, for example. There is an extensive library for Python projects to control distance, motion, or color sensors, which is explained in detail.
The extension costs just under $30. The matching power supply then costs a little less than $20.
Raspbee II: For home automation
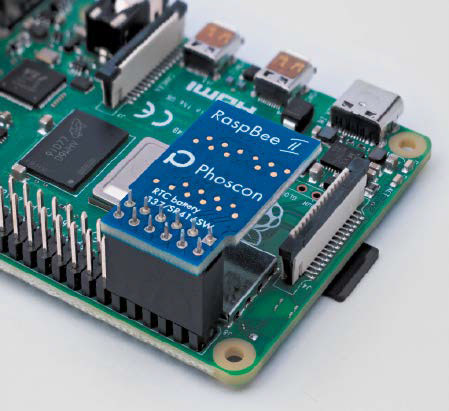
This small circuit board looks inconspicuous, but does a lot: it allows the Raspberry to communicate with smart home devices that use the Zigbee standard.
Raspbee
Are you looking for a way to control your smart home centrally via the Raspberry Pi? Then you should definitely take a look at the Raspbee II board. As the name suggests, it is an extension that communicates with devices that use the Zigbee standard. The tiny board even has a slot for a battery so that devices can be controlled via a real-time clock (RTC).
The basic idea is to get rid of the various gateways from other manufacturers. This also works as long as the components are recognized by the manufacturer’s software. It is therefore worth looking through the documentation before making a purchase decision. After all, Zigbee is just a communication protocol. The “magic” of the control system must then be performed by software.
This useful addition to the smart home costs less than $30.
Game Hat: The Raspberry becomes a console
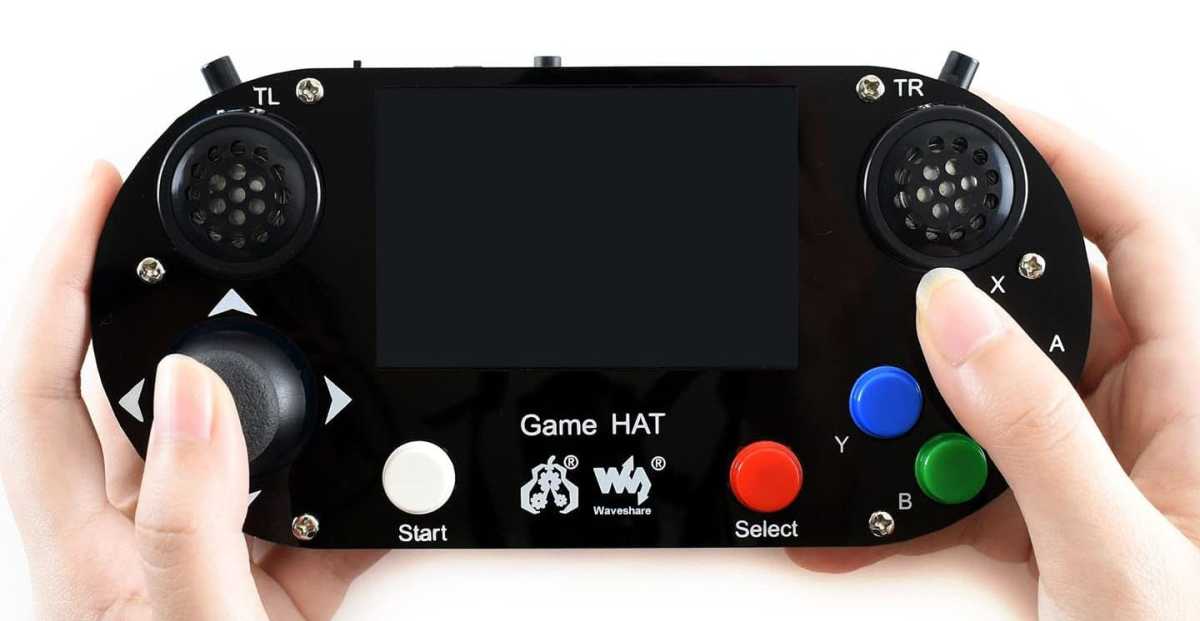
Who is connected to whom? It doesn’t matter — the Game HAT turns the small computer into a mini-game console, making it the ideal basis for retro games.
Waveshare
We presented the Retro-Pie project many years ago: The aim is to transform the small circuit board into a game console. The ideal companion for this project is the Game HAT from Waveshare. However, it is sometimes only available in Germany with a waiting period.
The term “HAT” doesn’t really fit here, because the Raspberry Pi is connected to the hardware of the gamepad. The Game HAT comes with a 3.5-inch screen with a resolution of 480×320 pixels and 60 FPS. This should easily suffice for classic games.
Two small speakers and a connection option for headphones are integrated. The usual buttons familiar from other gamepads are grouped around it. There are also two triggers on the top of the housing. However, these are quite delicate — so you shouldn’t play quite so wildly in order to keep the game fun for as long as possible.
It is very easy to set up. A battery is required to power the entire system so that you can play anytime and anywhere. You can find the specifications for purchasing the external power source in the product description and in the project wiki.
The manufacturer states that up to two hours of battery life are possible. However, this is very optimistic. In practice and when actively playing a game, the playing time is more likely to be a good hour. However, this does not detract from the fun with the extension, which costs around $45.
Machine learning with the Pi
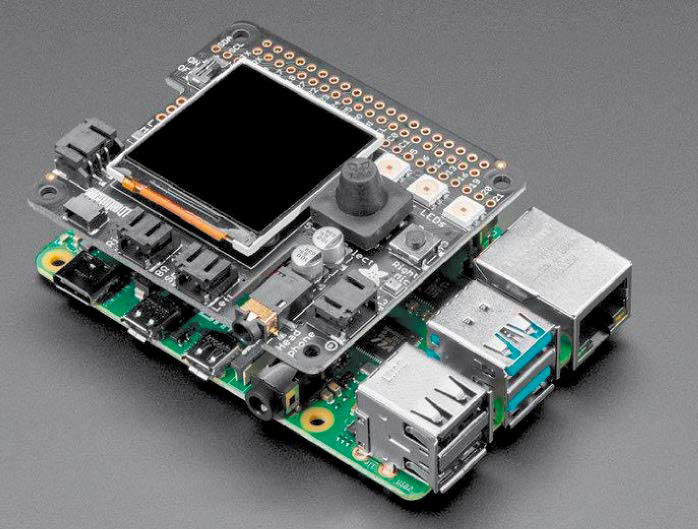
For machine learning, many samples must first be taken — for example, for image recognition. This add-on provides a large number of interfaces, but requires solid familiarisation.
IDG
Fascinating projects are possible with the Braincraft HAT. However, you also need to be willing to familiarize yourself with the complex subject matter. The extension is not for a “quick project” at a weekend.
The idea behind the add-on is to offer (even professional users) a way to create “brains” for machine learning in a wide variety of locations. Professionals also like to talk about edge computing in this context.
The “eyes” and other senses still need to be added to the combination of HAT and circuit board. But thanks to the versatile connection options, this is quite easy to do. The Braincraft HAT has a 240×240 TFT IPS screen to output feedback from the system, slots for camera connection cables for image processing projects, a five-way joystick, left and right microphones, stereo headphone output, stereo 1W speaker output, and three RGB dotstar LEDs. A Stemma QT connection allows the connection of thermal sensors. Optionally, you can also install a fan on the underside, which then keeps the board at a comfortable temperature for computing-intensive projects.
For a good $40, you get a very solid basis for your projects. The manufacturer shows the versatile possibilities in a series of videos on the product page.
Display: ‘Let there be touch’
Input directly on the screen? That’s no problem either. The resistive 3.5-inch display from Waveshare is a real HAT, which you simply attach to the GPIO bar as usual. The scope of delivery also includes the matching stylus. The drivers enable problem-free operation under Ubuntu Mate or Retropie. For around $40, you can add this simple input option to the Raspberry.
A touch display with a resolution of 800×480 pixels is available from the same manufacturer, which is significantly larger at 5 inches and capacitive (i.e. reacts to simple touch without pressure). This transforms the Pi into a small tablet. The drivers work excellently. As with other tablets, you can control the brightness of the screen directly on the desktop.
However, this display is not a direct HAT: Instead, you connect the board via a camera bar and cable. It wouldn’t have made much sense the other way round, as the screen is larger than the board itself. The advantage of this design is that the GPIO pins remain available and accessible.
And if you don’t want to design your own housing with a 3D printer, you can find a whole range of housings in electronics stores, some of which also have a stand to build a kind of kiosk system.
The street price for the larger display is around $50.
Essential HATs for hobbyists
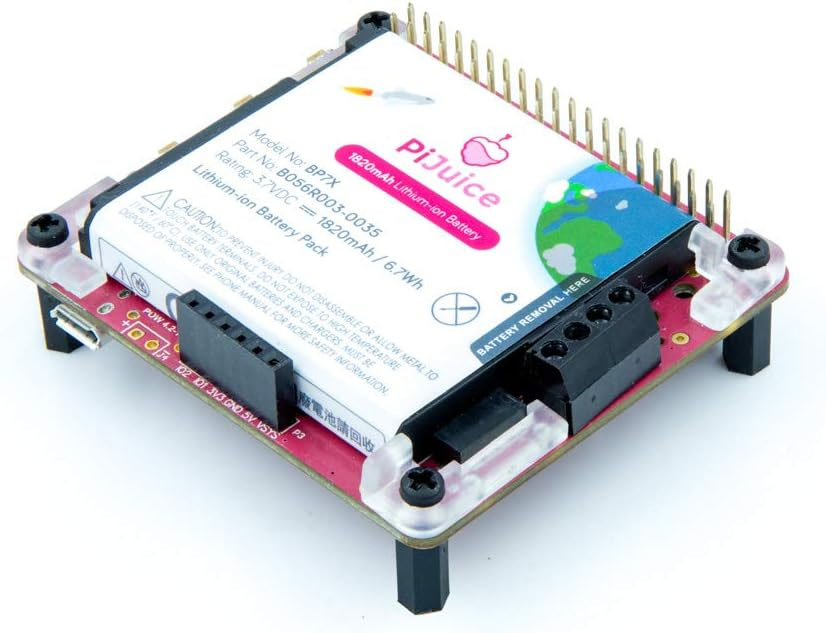
A lot of power, but at a price: With this HAT you can give the Raspberry Pi an external power supply with a large capacity.
PiJuice
One of the challenges for all outdoor projects is supplying the computer with power. This is because there is not always a power socket near the place of use. You can find a whole range of circuit boards that can supply the Raspi with power independently in the well-known electrical shops under the keyword “UPS.” These are often battery packs into which you only need to insert conventional rechargeable batteries. Waveshare, for example, has the UPS HAT on offer.
The Pi Juice is more expensive. For a good $50 upwards, you get a battery with a capacity of 1820 mAh. Performance has its price. Longer delivery times are also to be expected. The circuit board includes a Real Time Clock so that time controls and time stamps remain accurate.
Do you have a network switch that can supply power to devices connected via Ethernet cable? Then the official PoE+ HAT is a good choice for supplying the minicomputer with power via the Ethernet cable. The board can cope with input voltages from 37 to 57V and then supplies a constant 5V to the board. An integrated fan allows the higher temperature at the interface to dissipate. Before buying, however, you should check the voltage and therefore the power supplied by the network switch. If this is suitable, the $20 are a sensible investment for many work situations.
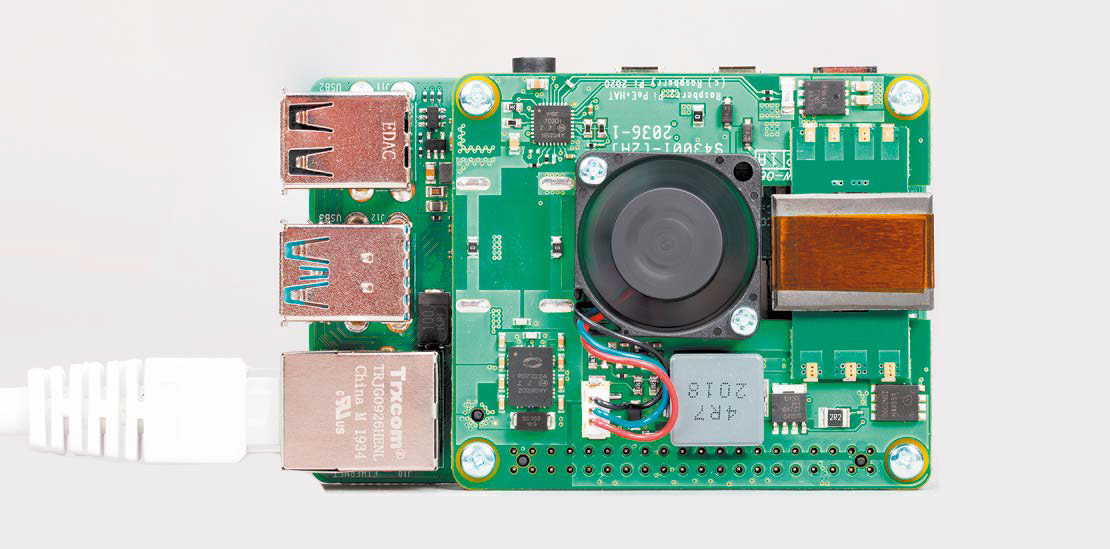
If you have a network switch that can be used as a power supply, this HAT is the right counterpart.
IDG
Getting started with robotics
Admittedly: At around $60 for a pure starter kit, the Trilobot from Pimoroni is no bargain. However, it forms the basis for entering the fascinating world of robotics. This is ensured by the extensive software library which, as usual from the manufacturer, is well documented.
What else do you need to buy to enjoy the full fun? Of course, you need a Raspberry Pi with the SD card as a basis. As this is the base for a mobile robot, you will also need a power supply that is independent of location. The excellent instructions show you how to attach the battery pack. You should definitely consult these before purchasing additional parts. A Raspberry Pi v2 camera is also quickly added to the shopping list so that you can also “see” from the robot’s perspective.
And what do you get for your money? Well, in this case too, “HAT” is rather misleading, because you actually install the Raspberry Pi 4 in the construction. This comprises a circuit board on which there are two electric motors that propel the wheels, which are reminiscent of a lunar vehicle. To avoid collisions, the kit has ultrasonic distance sensors. And to make driving the robot look really cool, RGB LEDs on the underside provide atmospheric lighting. The kit is of course also great for all employees in educational institutions to teach the basics of robotics.
Take note before you buy!
There is a wide range of HATs for the Raspberry family. Before buying, it is best to consider a few basic requirements.
Firstly, the most obvious: If you have given the Raspberry a housing, you will probably have to make a new investment. This is because the add-on will naturally increase the overall height and the hardware will no longer fit into the housing.
Then check the compatibility: The manufacturer’s product description should explicitly mention the Raspberry model you are using. The expansion board must fit both mechanically and on the connection side.
The extension must also be controllable. Software is therefore required in order to benefit from it. Find out in advance how this is done. In most cases, you will be able to access the components and pins via Python (libraries). Check whether the manufacturer provides tutorials or sample applications on their website.


