Have you ever moved IRL and then can’t figure out how to remove your old address information from Google Chrome’s autofill options? Or perhaps a friend used your laptop to fill out a form and their information persists in your Chrome browser’s options? Well, here’s how to clear that stuff out.
Find Google Chrome settings
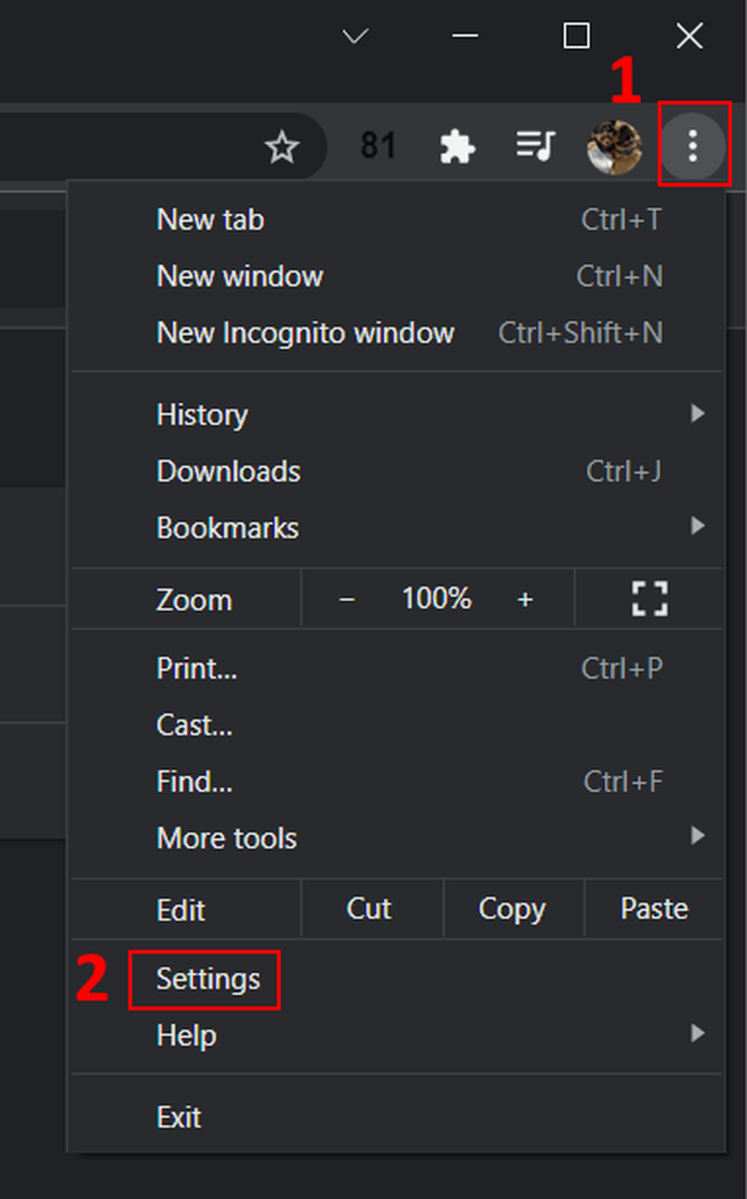
First, you’ll need to get into your Chrome settings. You can either type chrome://settings into the Chrome address bar, or follow these steps:
- Click the three vertically stacked dots in the upper-right side of your Chrome browser window
- Click on Settings in the menu that popped up

Kevin Casper/IDG
From here, you have two paths to clearing out the autofill data depending on whether you wish to toggle autofill capabilities in Chrome, clear specific autofill entries, or just wipe all of them out entirely.
PROMOTION
Remove annoying ads, Pop-Ups, and malware.

Guardio protects you from phishing, online scams, & identity theft. Install the Guardio browser extension and start being totally secure online. It’ll clean up your browser from harmful extensions, warn you before you open any dangerous sites or downloads, protect you from scammers, and alert you when your identity is at risk.
How to manage individual autofill settings
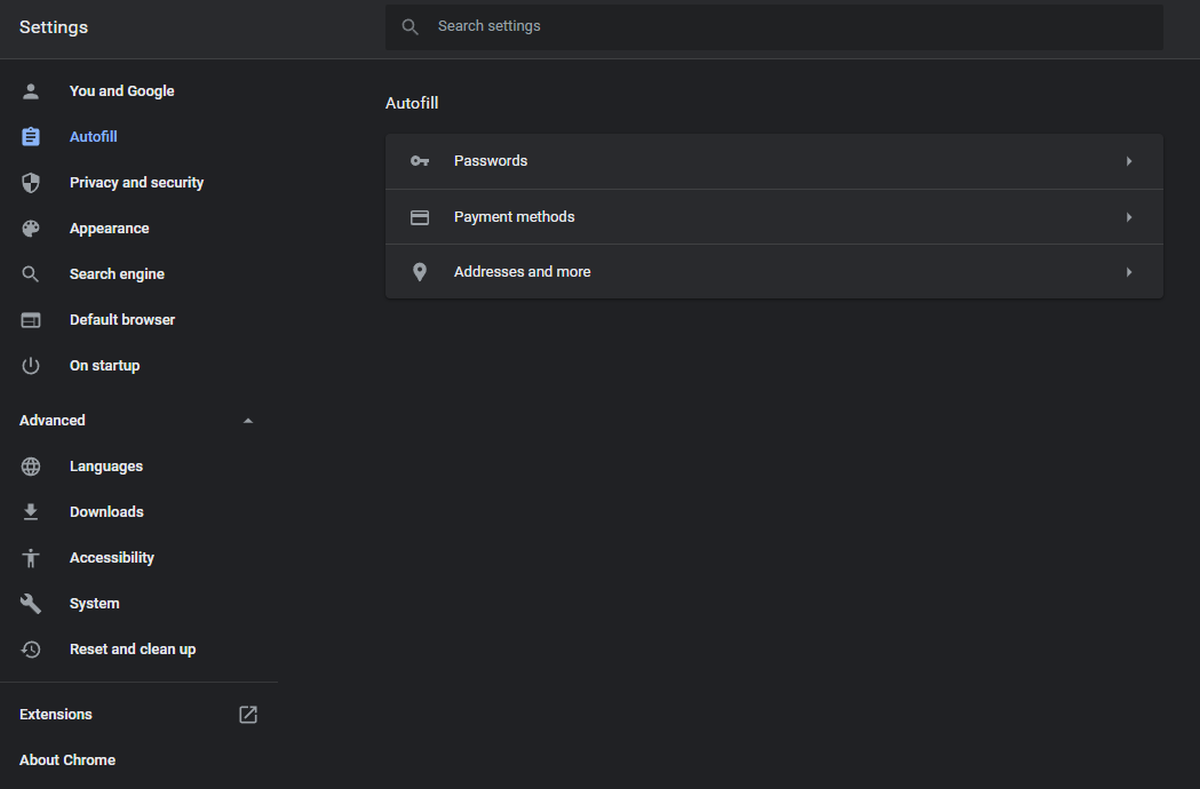
To manage Autofill settings and to clear out specific entries, you’ll want to click on Autofill in the list on the left of the Chrome Settings window. This will present a list of Autofill categories: Passwords, Payment methods, & Addresses and more
When you’re filling out a form and Chrome has autofill options for you, the options will typically have a Manage option at the bottom of the list. Clicking that will take you to this relevant Settings > Autofill area.

Kevin Casper/IDG
Selecting any of those Autofill options will provide a list of the relevant autofill data, alongside additional settings options, such as the toggle for having Chrome offer to save your passwords or payment details.

Kevin Casper/IDG
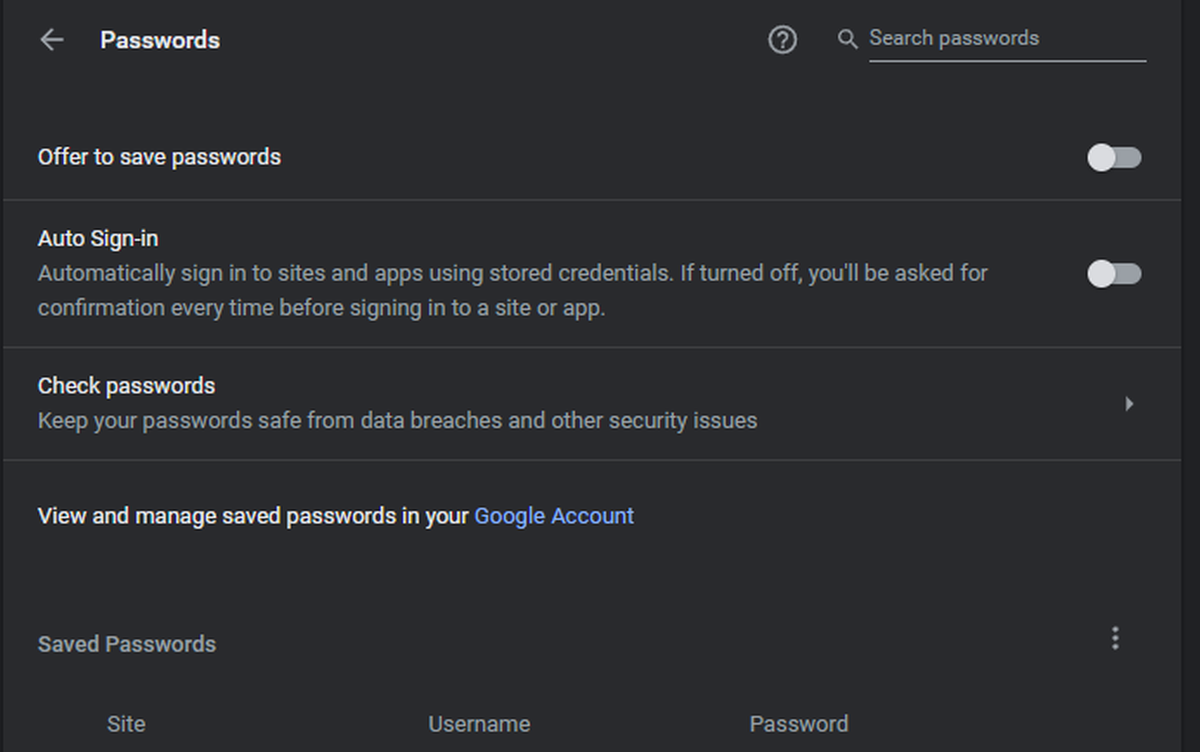
Under Passwords you can:
- Toggle Chrome’s ability to ask and save passwords.
- Toggle Chrome’s ability to automatically sign into sites that Chrome knows your credentials for.
- If you have any passwords saved in Chrome, Google is providing the additional service of checking your saved passwords against known security issues.
- Export your saved passwords by clicking the three vertically stacked dots to the right of Saved Passwords.
- See and manage any login information for sites you have saved to Chrome. Use the three vertically stacked dots next to each entry to see more details or remove entry.
- See and manage a blacklist of sites you’ve told Chrome to never save passwords for.

Kevin Casper/IDG
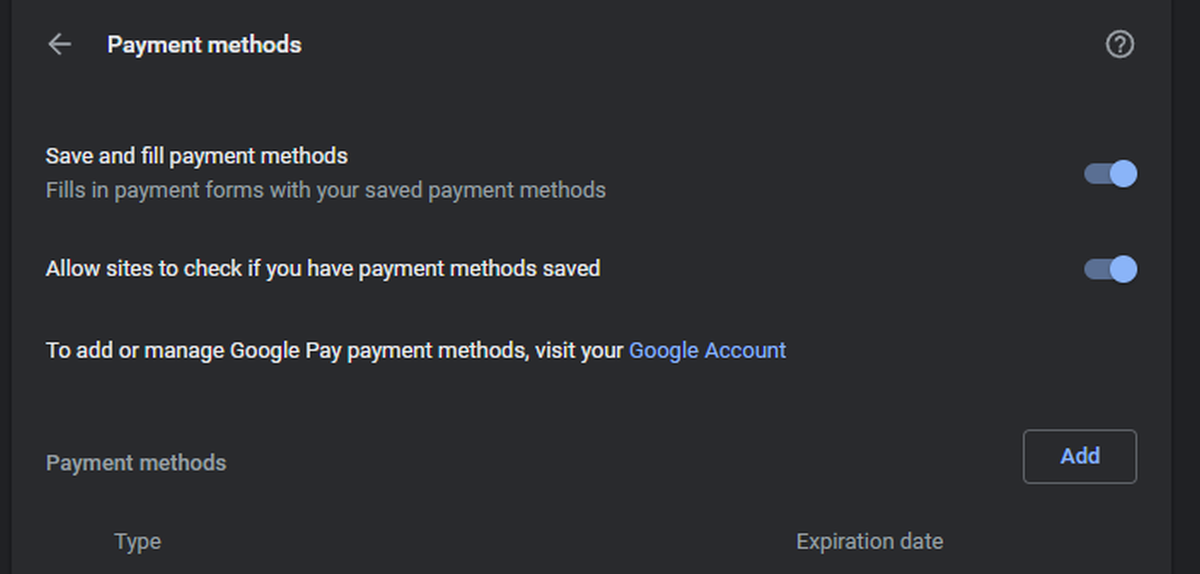
Under Payment methods, you can:
- Toggle Chrome’s ability to save and fill your payment information.
- Toggle whether you allow Chrome to provide information about saved payment methods to a third party.
- Add new payment method entries.
- See and manage existing payment methods, including those pulled from services like Google Pay. Use the three vertically stacked dots next to each entry to edit or remove them. For Google Pay options, you will see a box with an arrow pointing to the upper-right corner, which is a link to your Google Pay settings for managing payment information.

Kevin Casper/IDG
Under Addresses and more, you can:
- Toggle Chrome’s ability to save and fill your address and contact information.
- Add new address or contact information entries.
- See and manage your existing address/contact information entries. Use the three vertically stacked dots next to each entry to edit or remove them.
How to wipe all autofill data

Kevin Casper/IDG
- Click on Privacy and security on the left-hand side of the Chrome Settings window
- Click Clear browsing data from the new list in the middle
- In the popup pane, select Advanced at the top
- Check the box for Passwords and other sign-in data
- Check the box for Autofill form data
- Click the Clear data button on the bottom of the popup frame
Please note that this method won’t prevent your browser from collecting and suggesting additional autofill entries in the future. You will want to pop in to the specific Autofill settings described above to toggle those capabilities off, if you wish to do so.
That should just about cover it! Now you know how to get rid of that address from that one time you had a gift sent directly to your friend’s place.


